Honda Fit/Jazz - A/T Shift Cable Replacement (CVT)
A/T Shift Cable Replacement
| 1. | Raise the vehicle, and make sure it is securely supported.
|
Remove the center console, and remove the heater duct.
| 3. | Shift into the N position.
|
| 4. | Remove the nut securing the shift cable end, then separate the cable end from the shift lever.
 |
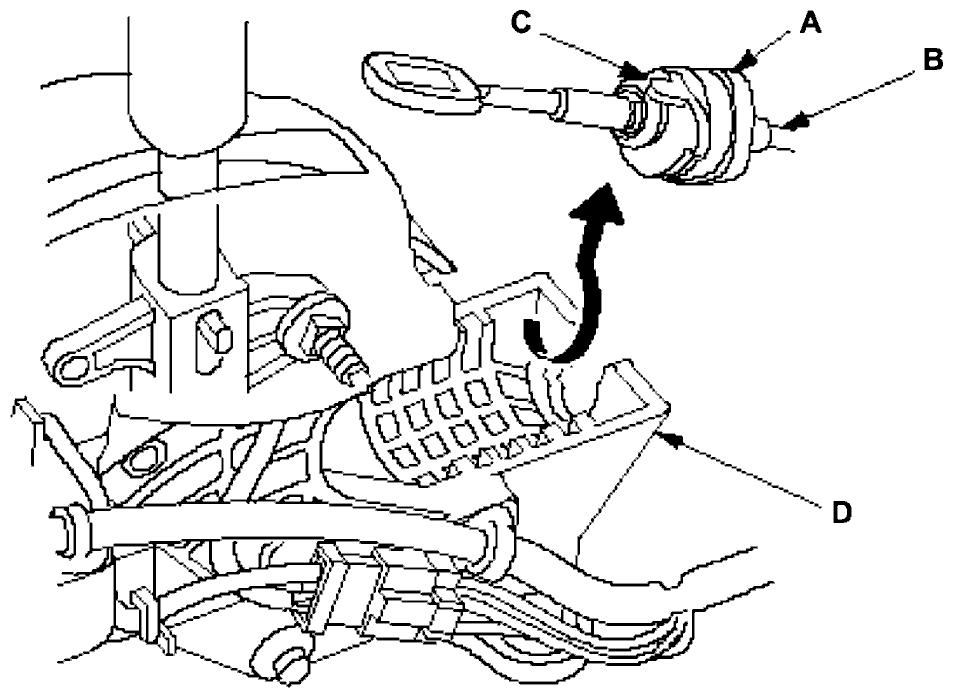
| 5. | Rotate the socket holder (A) on the shift cable (B) a quarter turn; the tab (C) on the socket holder will be in the opening of the shift lever bracket base (D). Then slide the holder to remove the shift cable from the shift lever bracket base.
 |
| 6. | Remove the shift cable bracket (A) and grommet (B), then pull the shift cable (C) out from the cabin.
 |
| 7. | Remove the air cleaner housing and intake air duct.
|
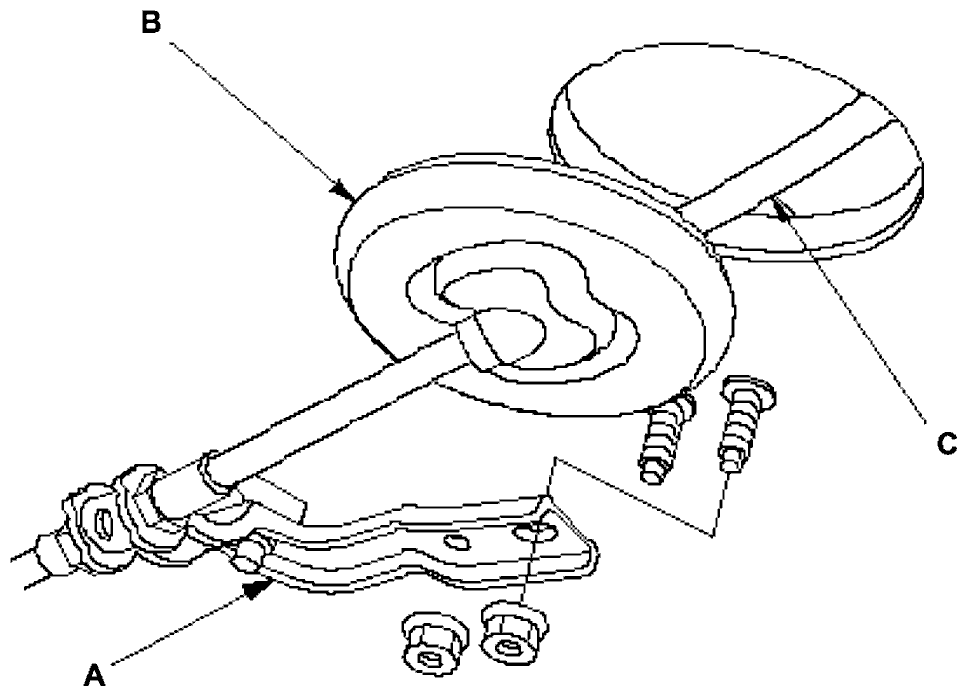
| 8. | Remove the spring clip (A) and washers (B), then separate the shift cable end (C) from the control lever (D).
 |
| 9. | Remove the bolts on the shift cable bracket plate (E), then remove the shift cable (F) from the shift cable bracket (G).
|
| 10. | Insert the new shift cable (A) through the grommet hole (B). Do not bend the shift cable excessively.
 |
| 11. | Install the shift cable bracket (C) on the body, then install the grommet (D).
|
| 12. | Install the shift cable end (A) on the control lever (B).
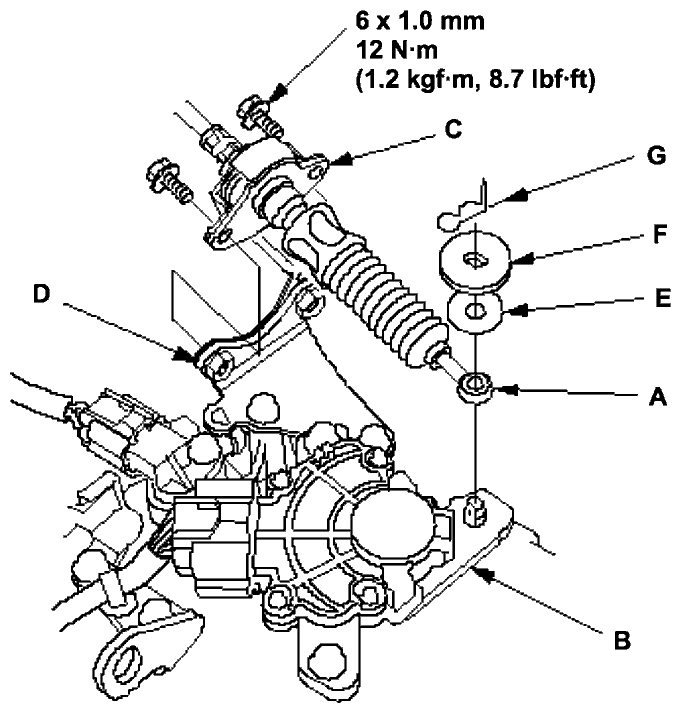 |
| 13. | Secure the shift cable bracket plate (C) on the shift cable bracket (D) with the bolts.
|
| 14. | Install the plastic washer (E), then install the steel washer (F), and install the spring clip (G) in the direction shown.
|
| 15. | Turn the ignition switch ON (II), and verify that the N position indicator comes on.
|
| 16. | If necessary, push the shift cable (A) until it stops, then release it. Pull the shift cable back two steps so that the shift position is in N. Do not push and pull the shift cable by holding the shift cable guide (B).
 |
| 17. | Turn the ignition switch OFF.
|
| 18. | Shift the shift lever into N position.
|
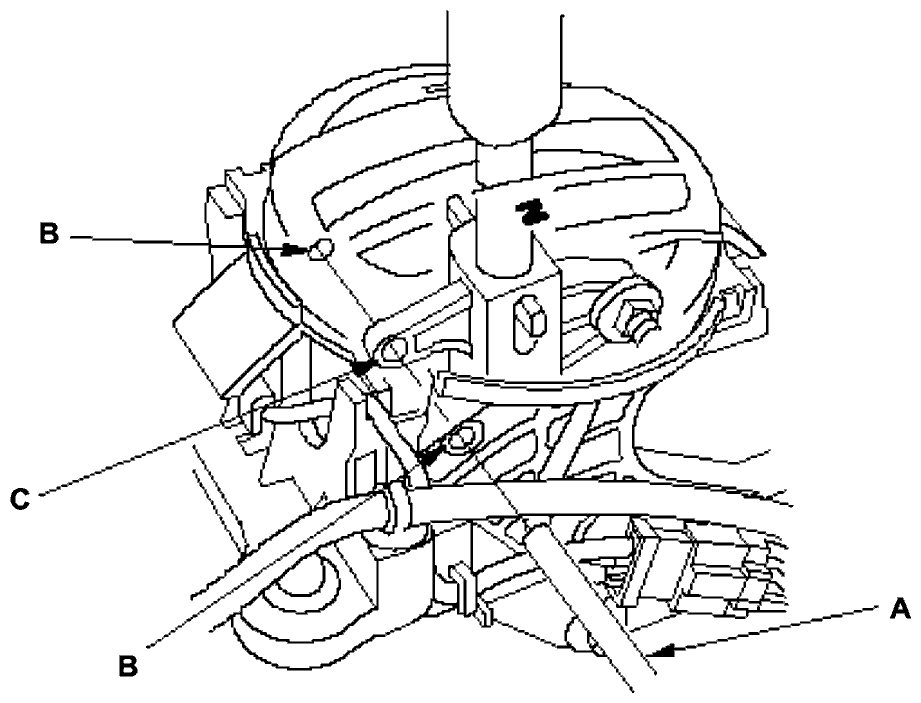
| 19. | Insert a 6.0 mm (0.24 in.) pin (A) through the positioning holes (B) on the shift lever bracket base and into the positioning hole (C) on the shift lever. The shift lever is secured in the N position.
 |
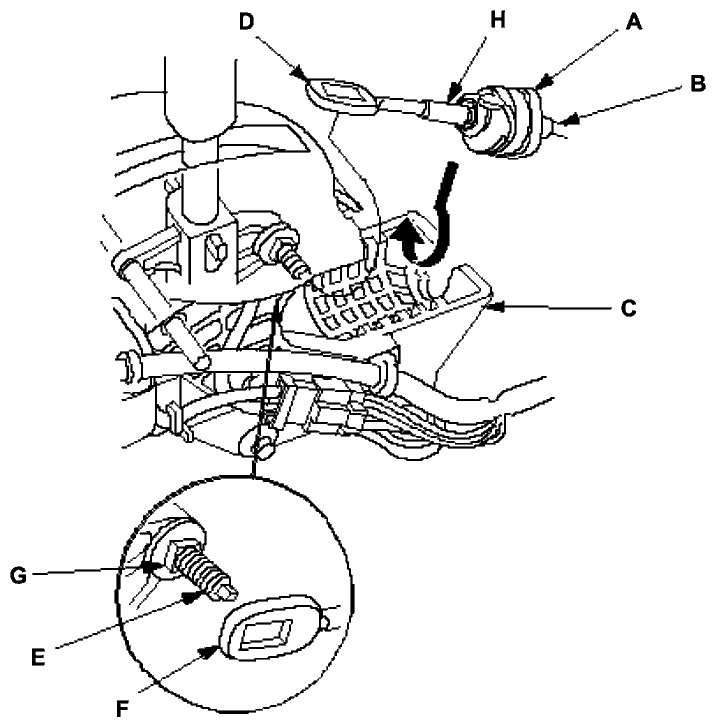
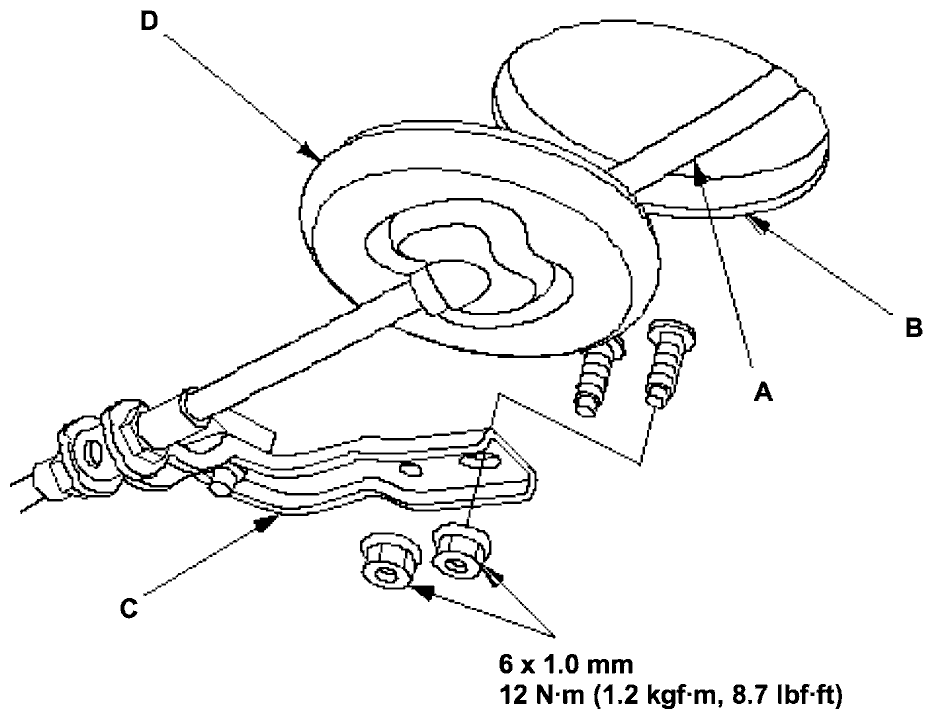
| 20. | Align the socket holder (A) on the shift cable (B) with the slot in the bracket base (C), then slide the holder into base. Install the shift cable end (D) over the mounting stud (E) by aligning its square hole (F) with the square fitting (G) at the bottom of the stud. Rotate the holder a quarter turn to secure the shift cable. Do not install the shift cable by twisting the shift cable guide (H).
 |
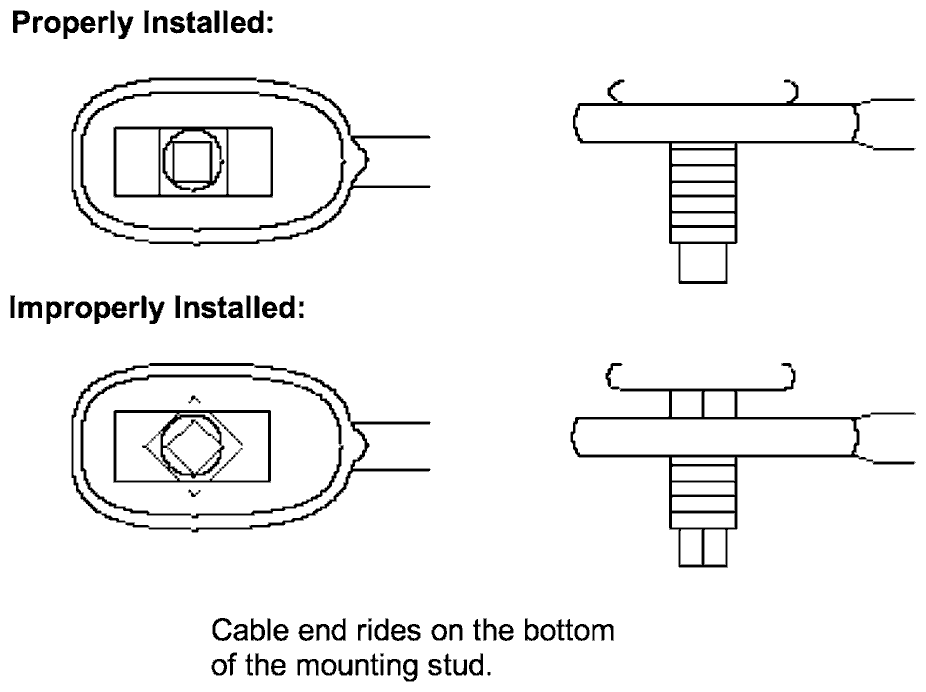
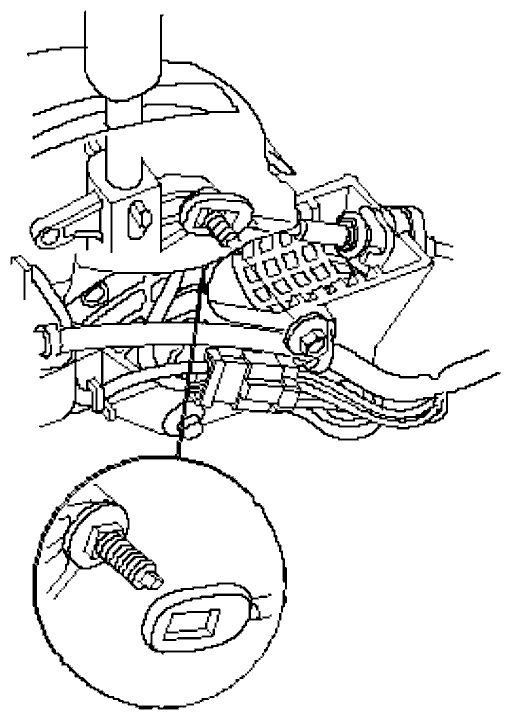
| 21. | Verify that the shift cable end is properly installed on the mounting stud.
 |
| 22. | If improperly installed, remove the shift cable from the shift lever bracket base, and reinstall the shift cable. Do not install the shift cable end on the mounting stud while the shift cable is on the shift lever bracket case.
|
| 23. | Install and tighten the nut.
 |
| 24. | Remove the 6.0 mm (0.24 in.) pin (A) that was installed to hold the shift lever.
|
| 25. | Turn the ignition switch ON (II), and move the shift lever to each position. Verify that the A/T gear position indicator follows the transmission range switch.
|
| 26. | Start the engine, and check the shift cable adjustment with pressing the brake pedal.
|
| 27. | Push the shift lock release, and verify that the shift lever releases, and also check that the shift lever locks when it shifts back in the P position.
|
| 28. | Reinstall the center console, and heater duct.
|
| 29. | Install the air cleaner housing and intake air duct.
|
Honda Fit/Jazz 02-05 Workshop Manual
Back to all Manuals